


Easter is just a hop away! And while dying eggs is a tradition, this year, we’re putting a twist on the decor with the ultimate Easter Egg Bunny for you! Match these with your normal dyed eggs, and you’ve got a egg-stra perfect match. Follow the steps below to create this family-friendly and adorable bunny egg right in time for Easter.
Tools
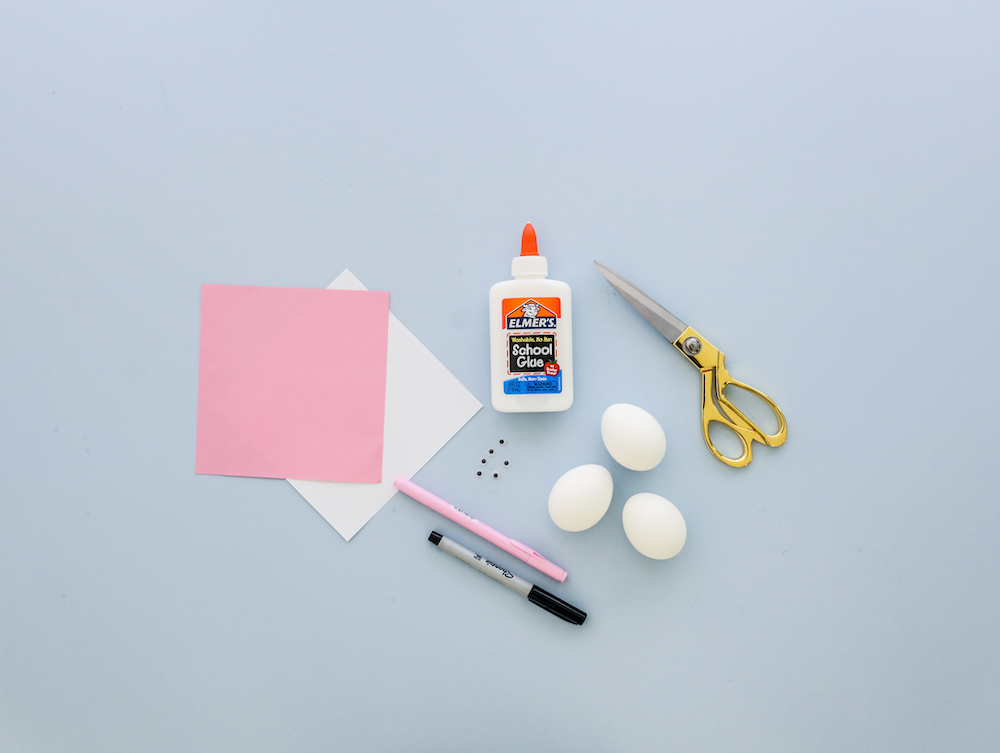
Hard boiled eggs
1 sheet of white craft paper
1 sheet of pink craft paper
Pink and black permanent markers
Googly eyes
Super glue or hot glue
Scissors
Steps
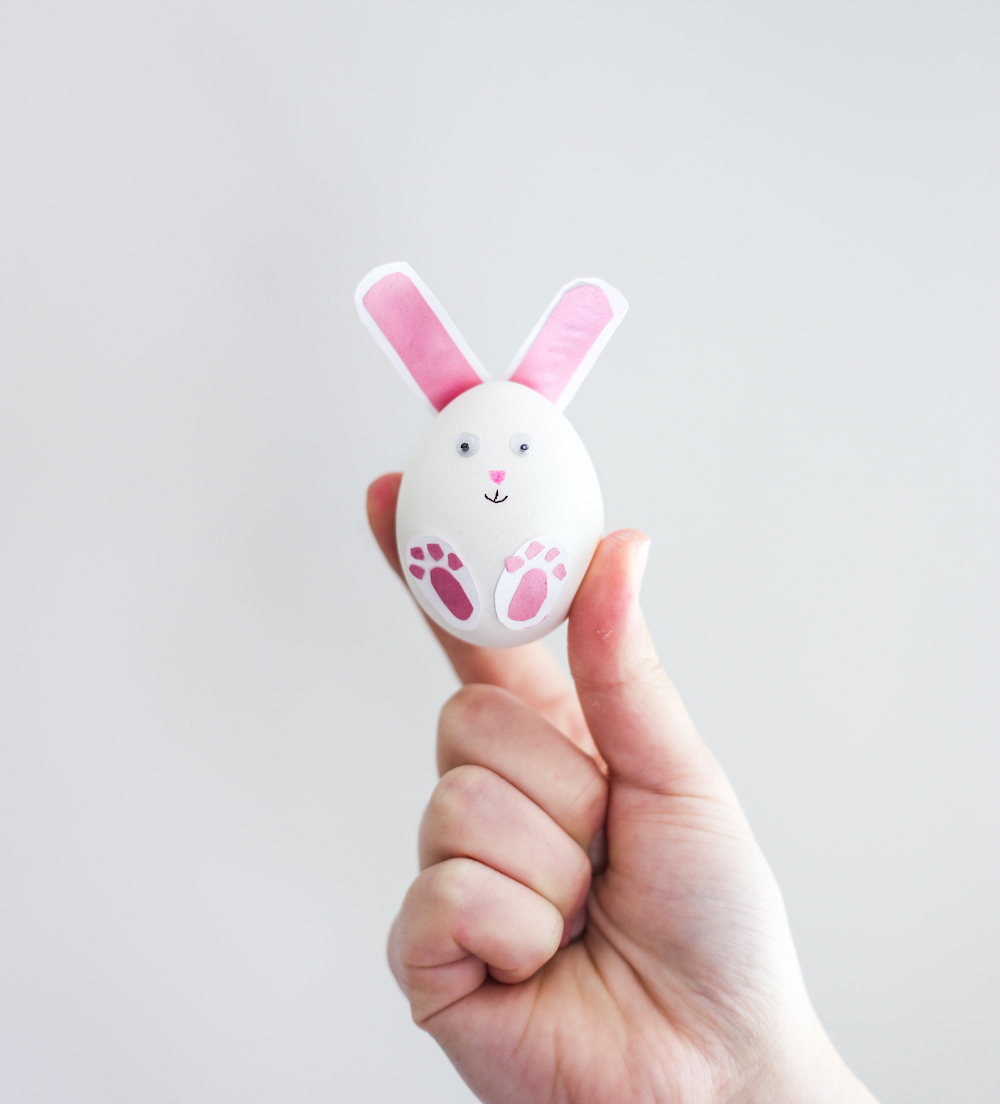
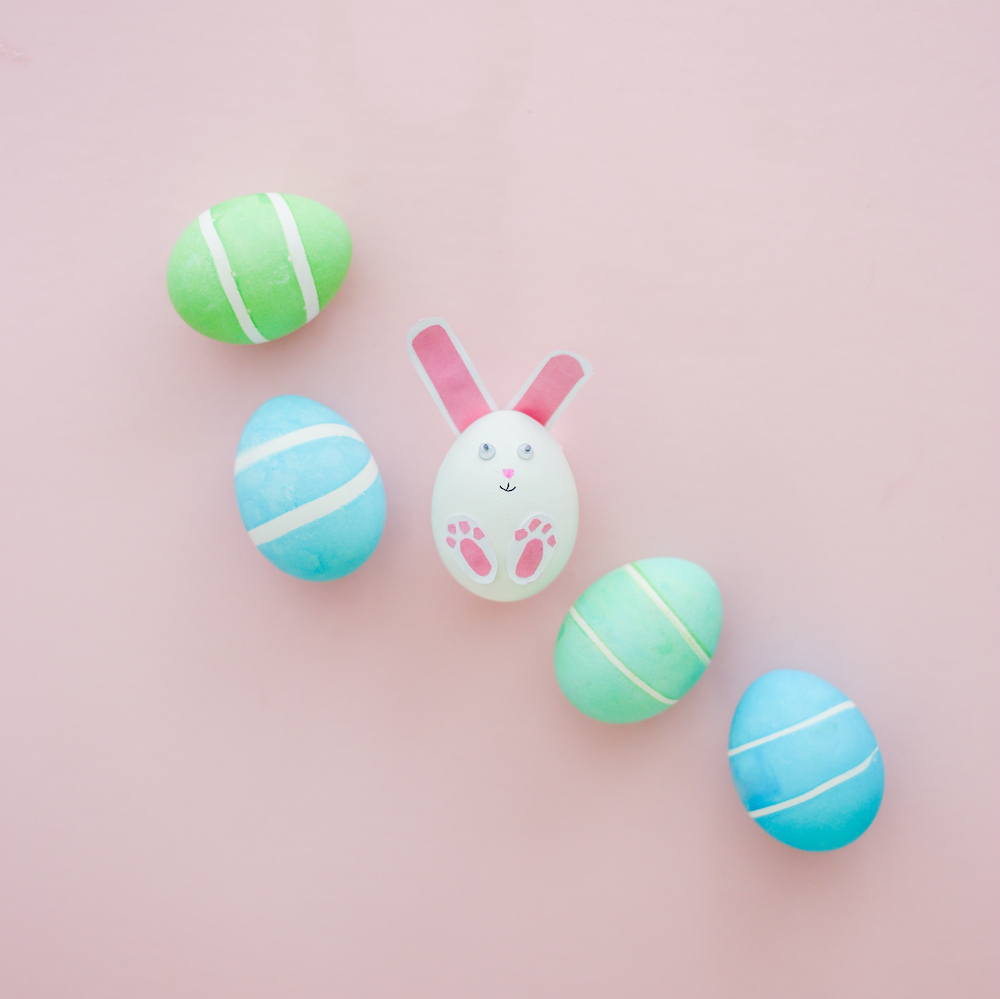
For the bunny feet: Cut out two ovals around 1 inch wide, and 1 1/8 inches long from the white paper. Cut smaller pieces from the pink paper for the paws—one larger oval, and four smaller for each foot. Glue them on the larger white paper ovals.
Glue the feet onto the bottom of the egg on the front side so that they are 3/4 of the way down the egg.
For the ears: Cut out two narrow ovals from the paper for bunny ears. They should be about 1 1/2 inches long and 1/2 inch wide. Cut out two slightly smaller ovals out of the pink paper and glue them onto the white creating a border.
Place the ears on the top of the egg and glue them slightly behind the top so that they can stick up straight.
Glue the googly eyes onto the egg, about 1/3 of the way down from the top on the front side.
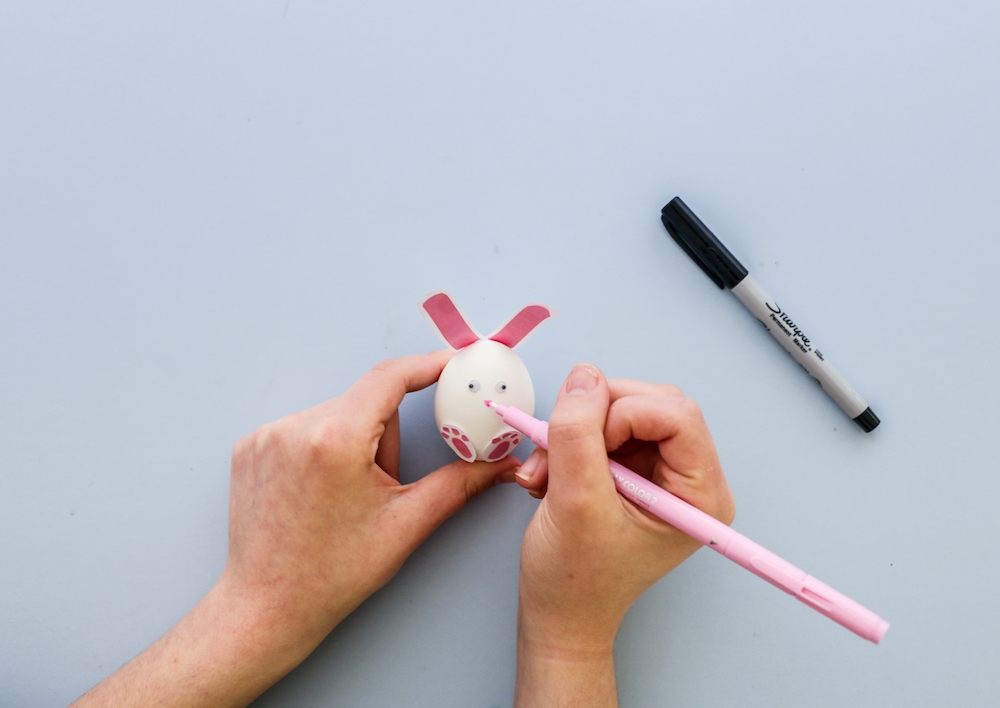
Use the pink marker to draw a nose on the egg, slightly below the eyes. Then use the black marker to draw a mouth to complete the bunny face.
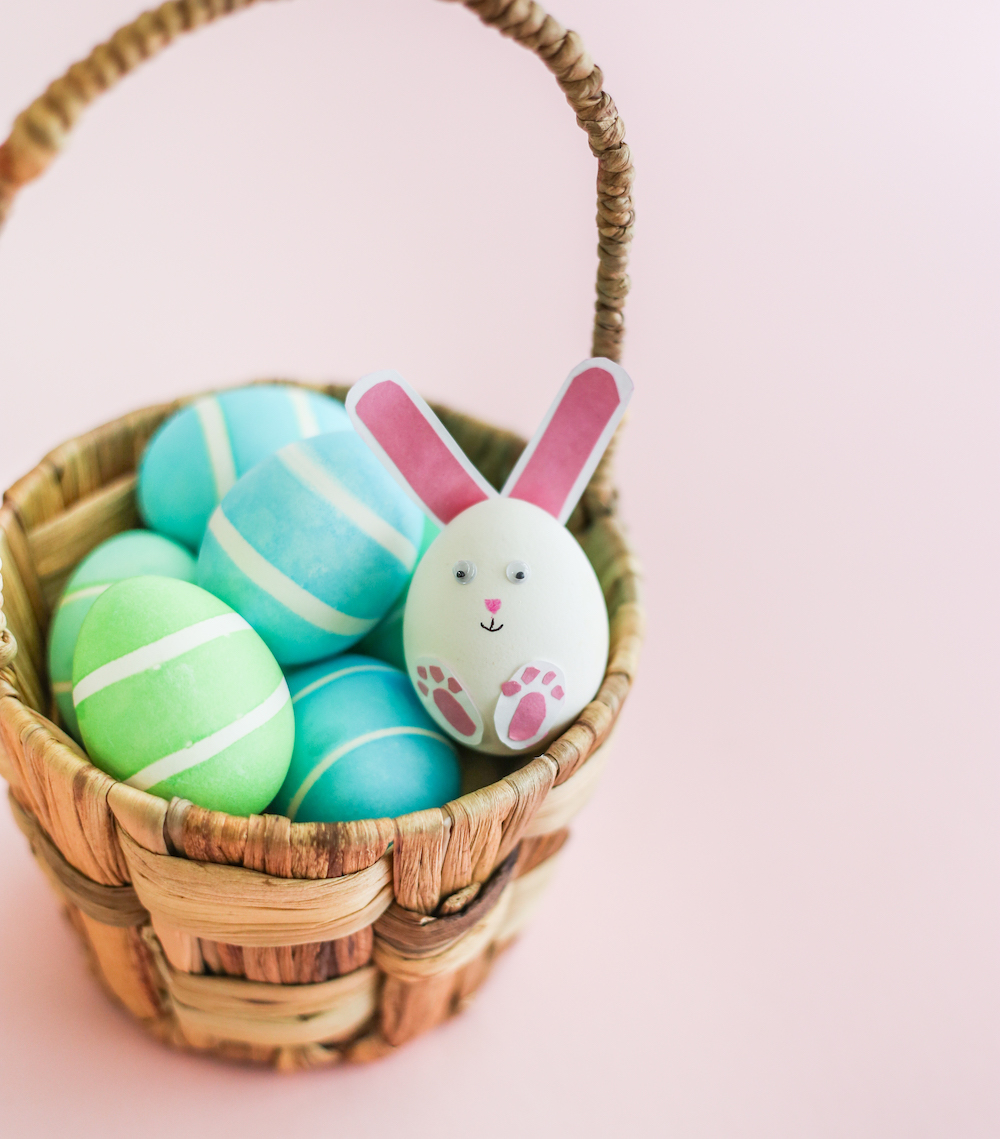
Repeat on multiple eggs to make more bunnies. Add them to an Easter basket for an adorable and festive decoration!
Looking for more Easter DIYs? If there’s anything better than decorating easter eggs, it has to be eating chocolate ones. That’s all yolks (last pun, we promise). Happy Easter from all of us at the Bay Club!