


If you’re like us, you love Valentine’s Day and all that’s associated with it, including the giving and receiving of Valentines with friends, family, and that special someone. From heartfelt to funny, we’ve seen all types of cards this year—but we know the best are homemade, like this pop-up card—and what better time to send a homemade card than this year! And trust us, whoever you give this card to will love it bear-y much!
DIY Valentine
Items needed:
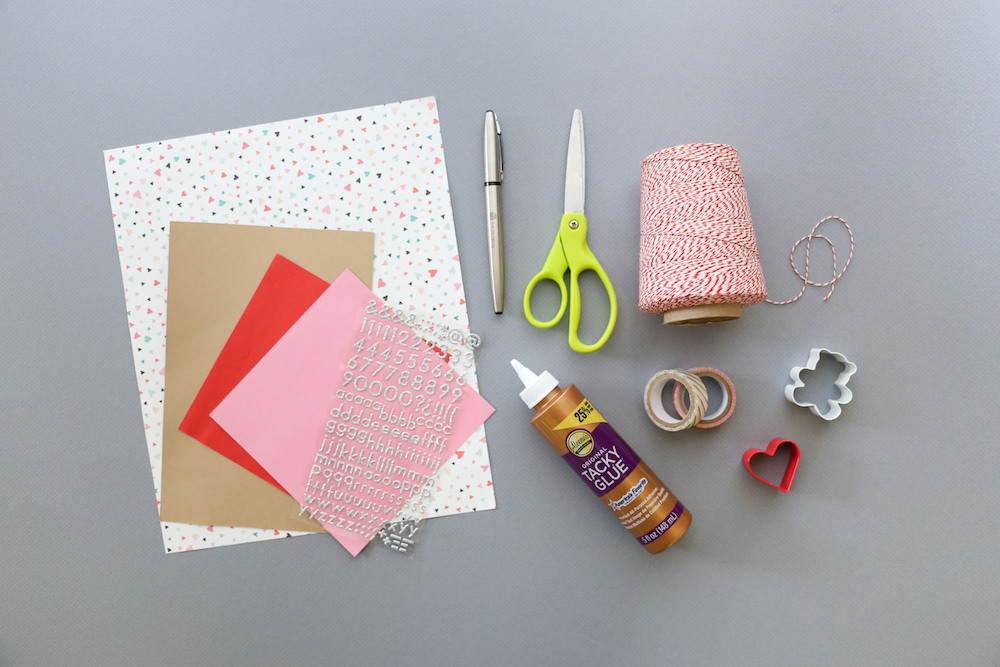
- Thick brown paper
- White paper
- Colored paper: Red, pink, pattern
- Scissors
- Ruler
- Black pen
- Alphabet stickers
- Glue
- Twine
- Decorative tape
- Optional: Heart & bear shaped stencils (or cookie cutters)
Instructions
1. Start with your thick brown paper. Cut it into a 9” x 6″ piece, then fold it in half to make a 4.5” x 6” card.
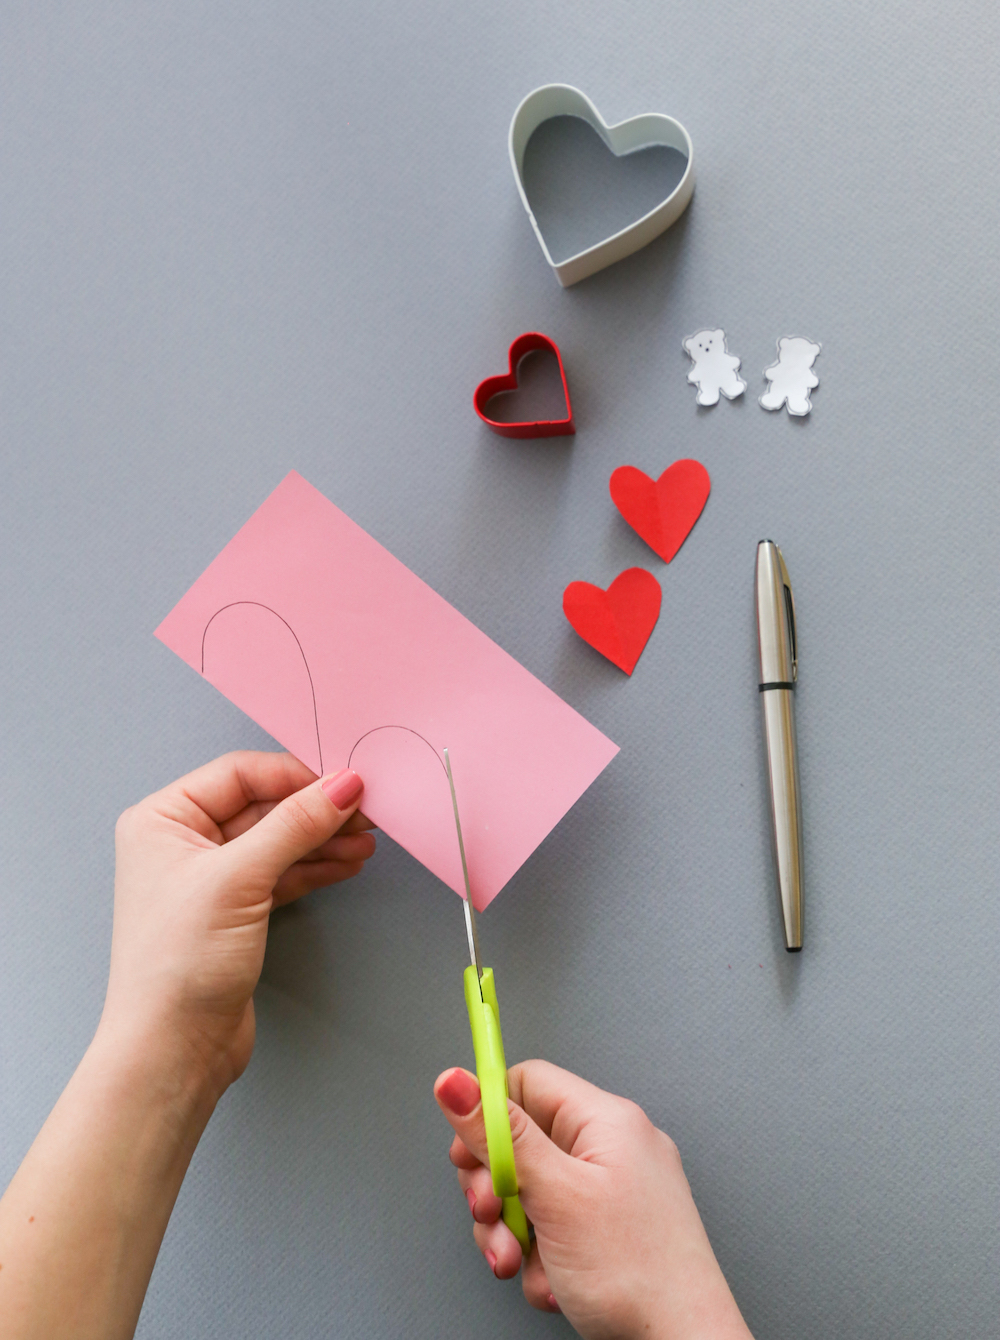
2. Trace the shapes and cut out two large hearts from the pink paper, two small hearts from the red paper, and two clouds and two bears from white paper.
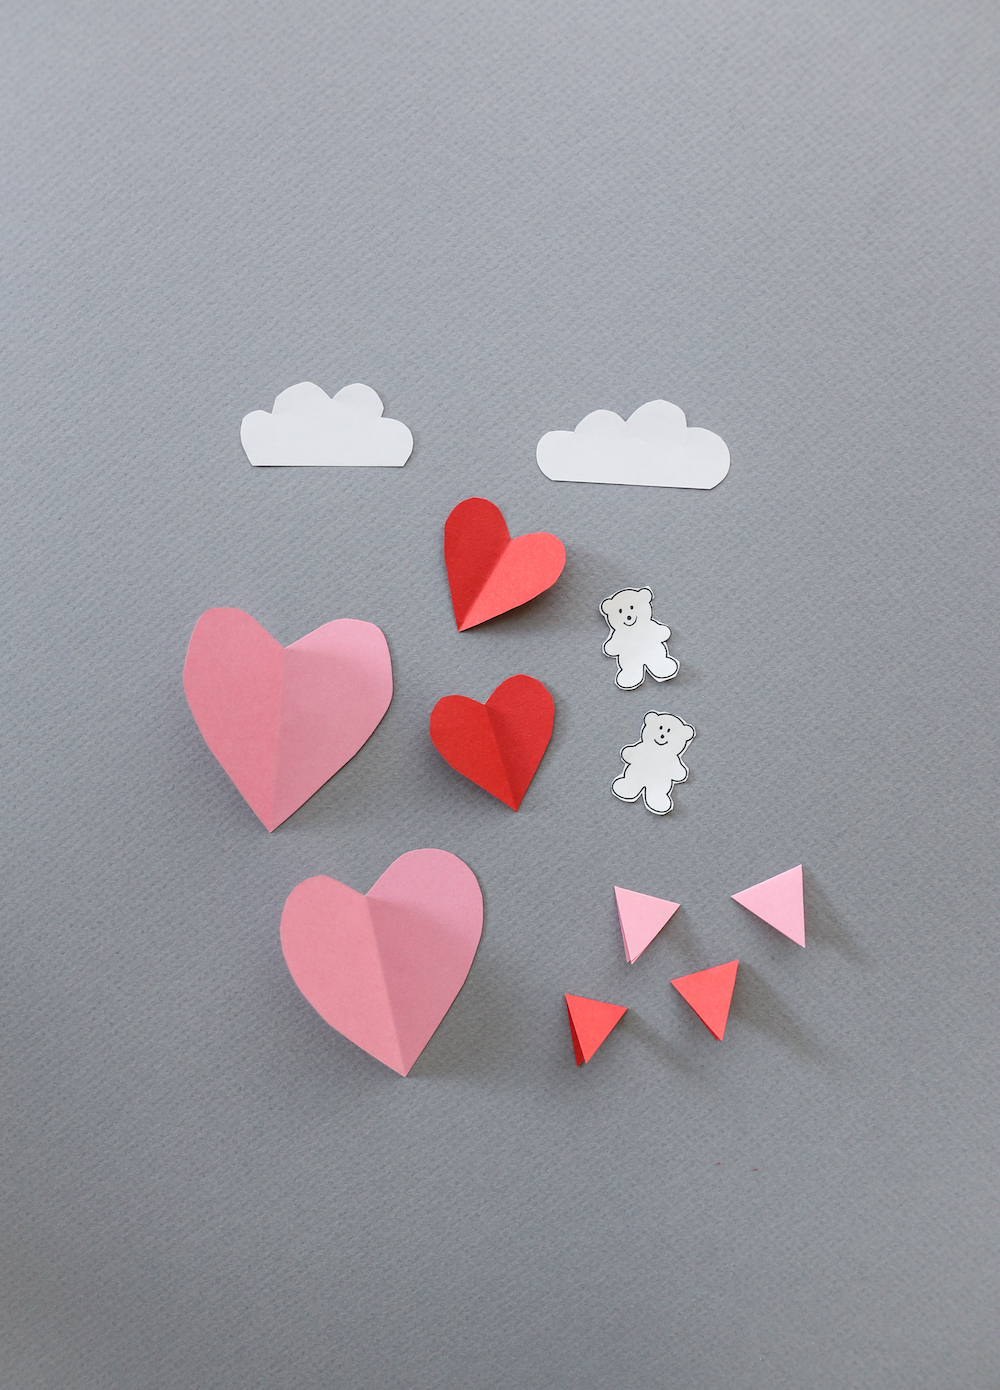
3. Using your leftover pink and red paper from the hearts, cut out four triangles for the flags (two pink, two red).
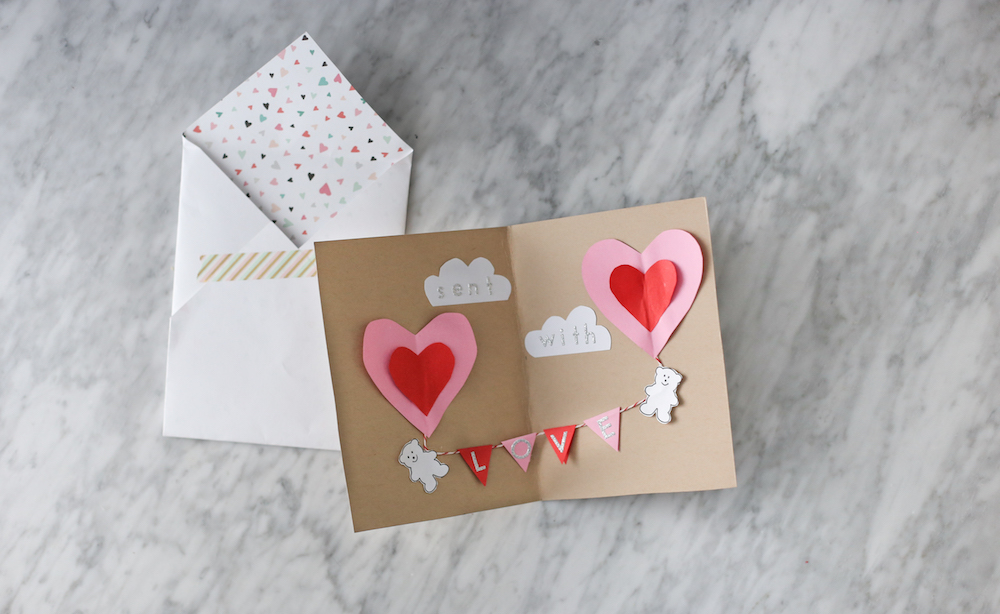
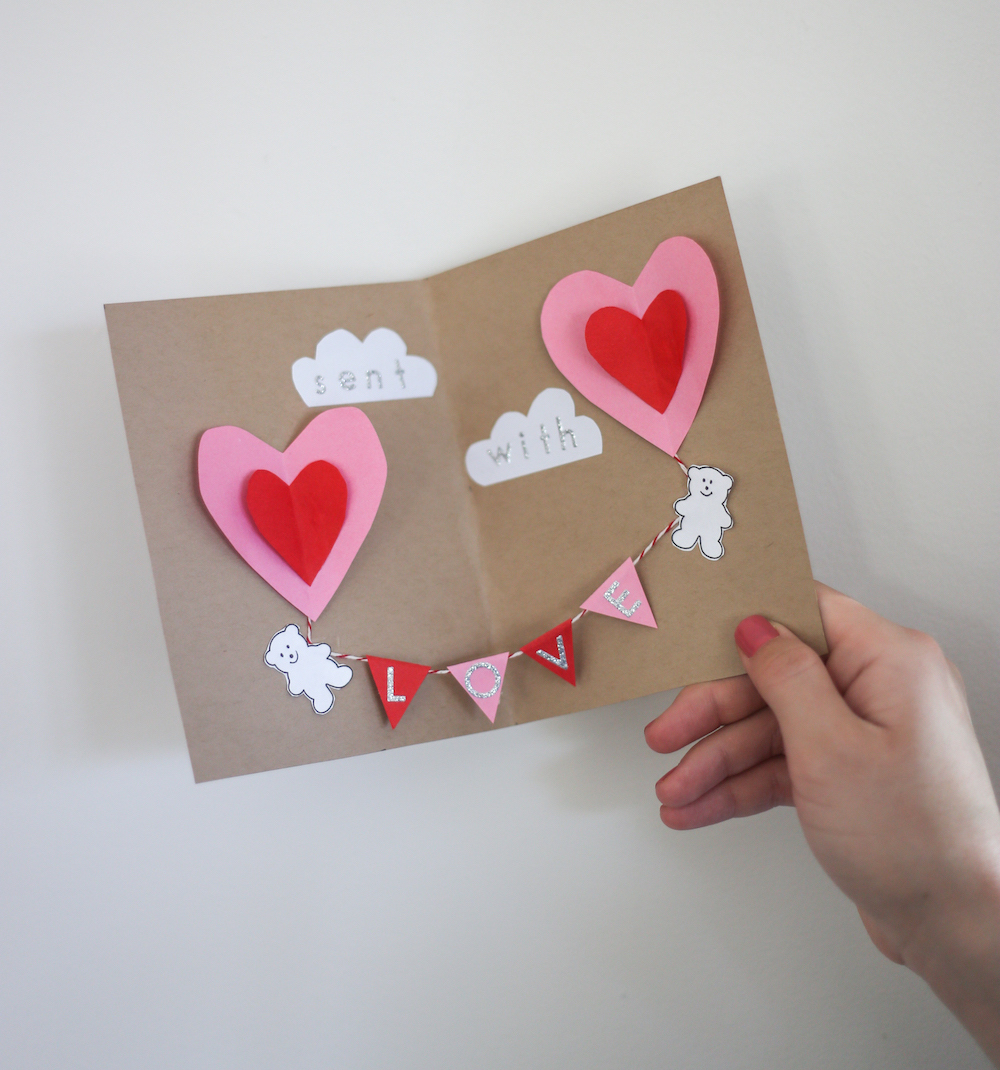
4. Using the alphabet stickers, spell out “sent” and “with” on the clouds, and “LOVE” on the flags.
5. Cut one piece of twine, about 8”, and glue the flags to it, leaving 1 cm between each letter.
6. Now it’s time to glue! First, glue the smaller heart to the larger ones. Only put glue down the center of the heart (as pictured), so it isn’t glued flat.
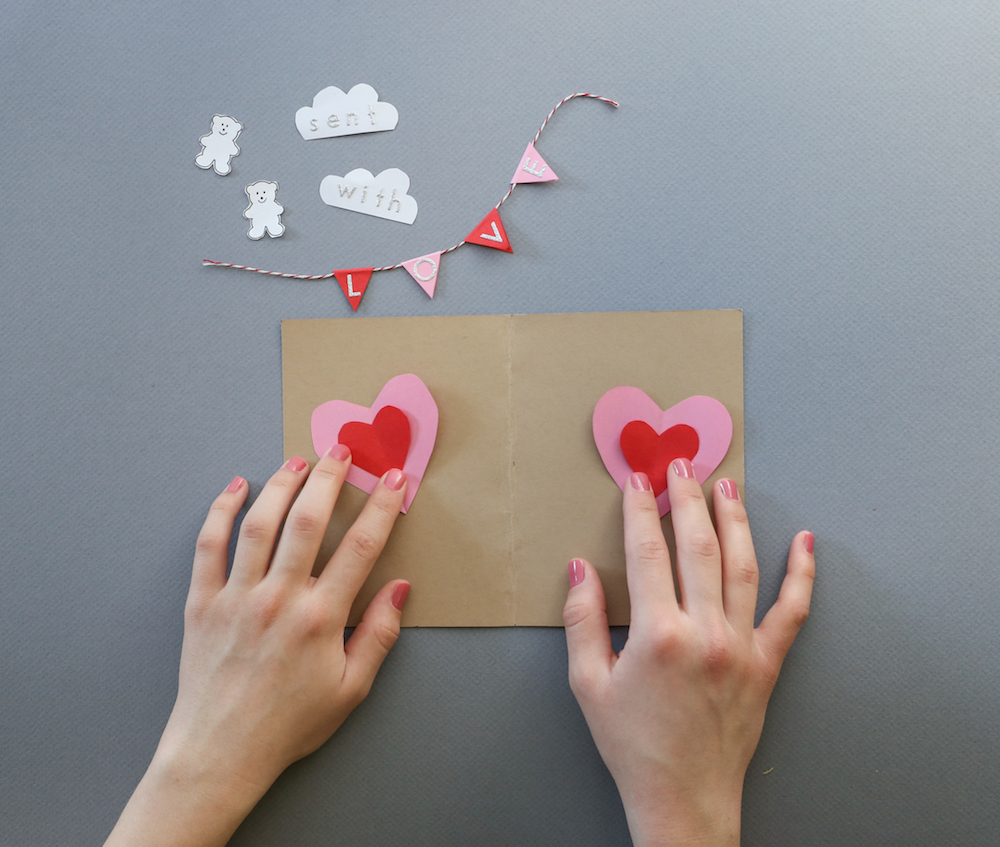
7. Glue the larger hearts to the card, once again, only applying glue to the center of the heart. This will add dimension to the card.
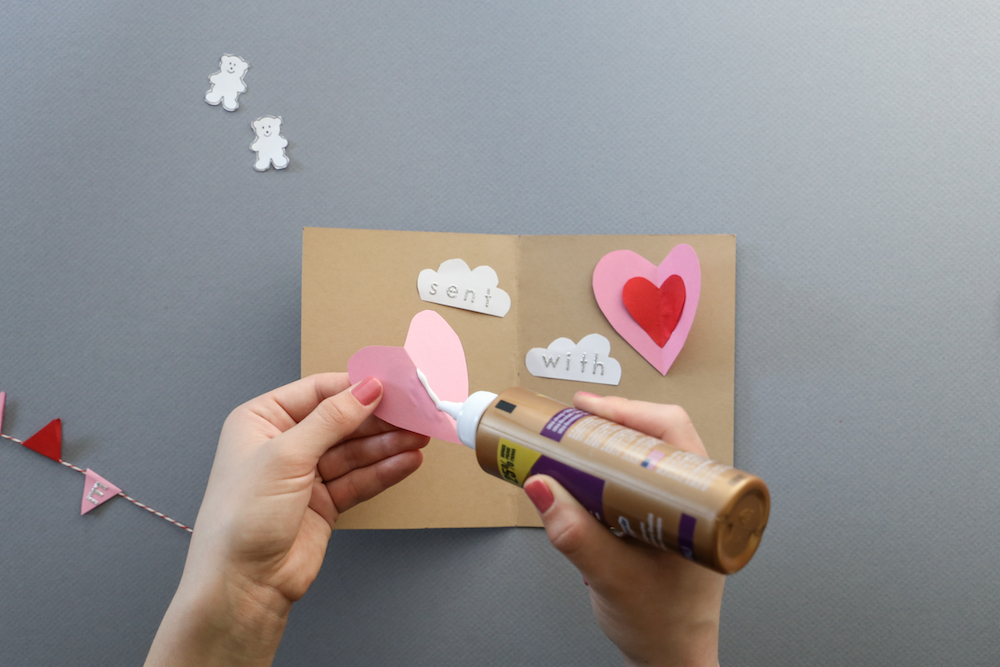
8. Glue the clouds: The “sent” cloud on the left, and “with” on the right side of the card.
9. Lay out the “LOVE” banner to stretch across the crease of the card. Glue the string ends tight enough so when the card is open, the banner will hang, but not go past the bottom of the card.
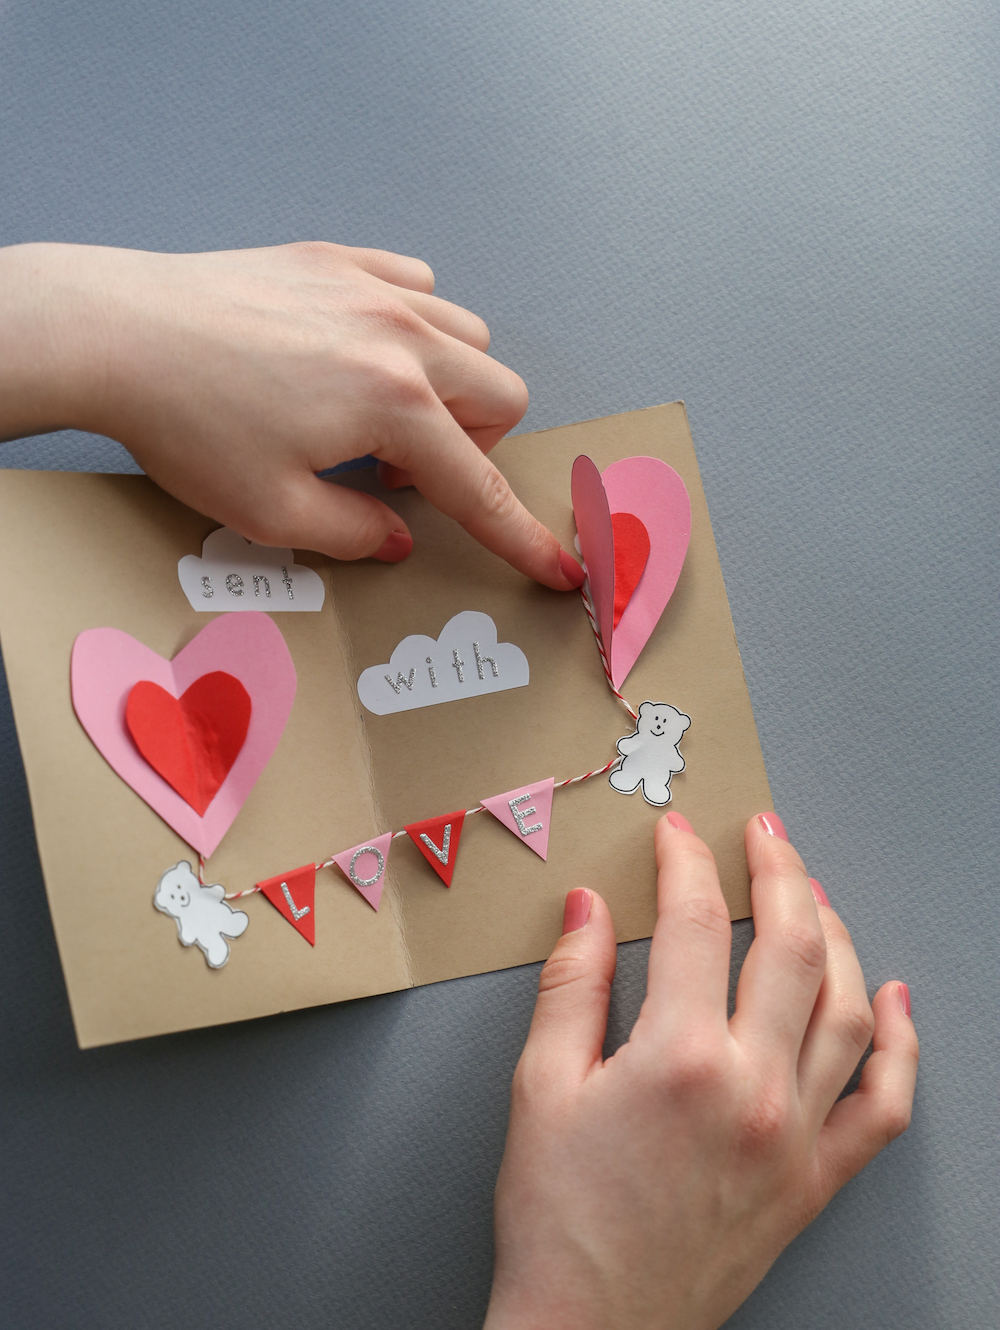
10. Glue the bears on either side of the banner, and tuck the excess string under the hearts. Add another dab of glue, if needed.
11. Let the card dry. Meanwhile, we’ll make the envelope!
Instructions for Envelope:
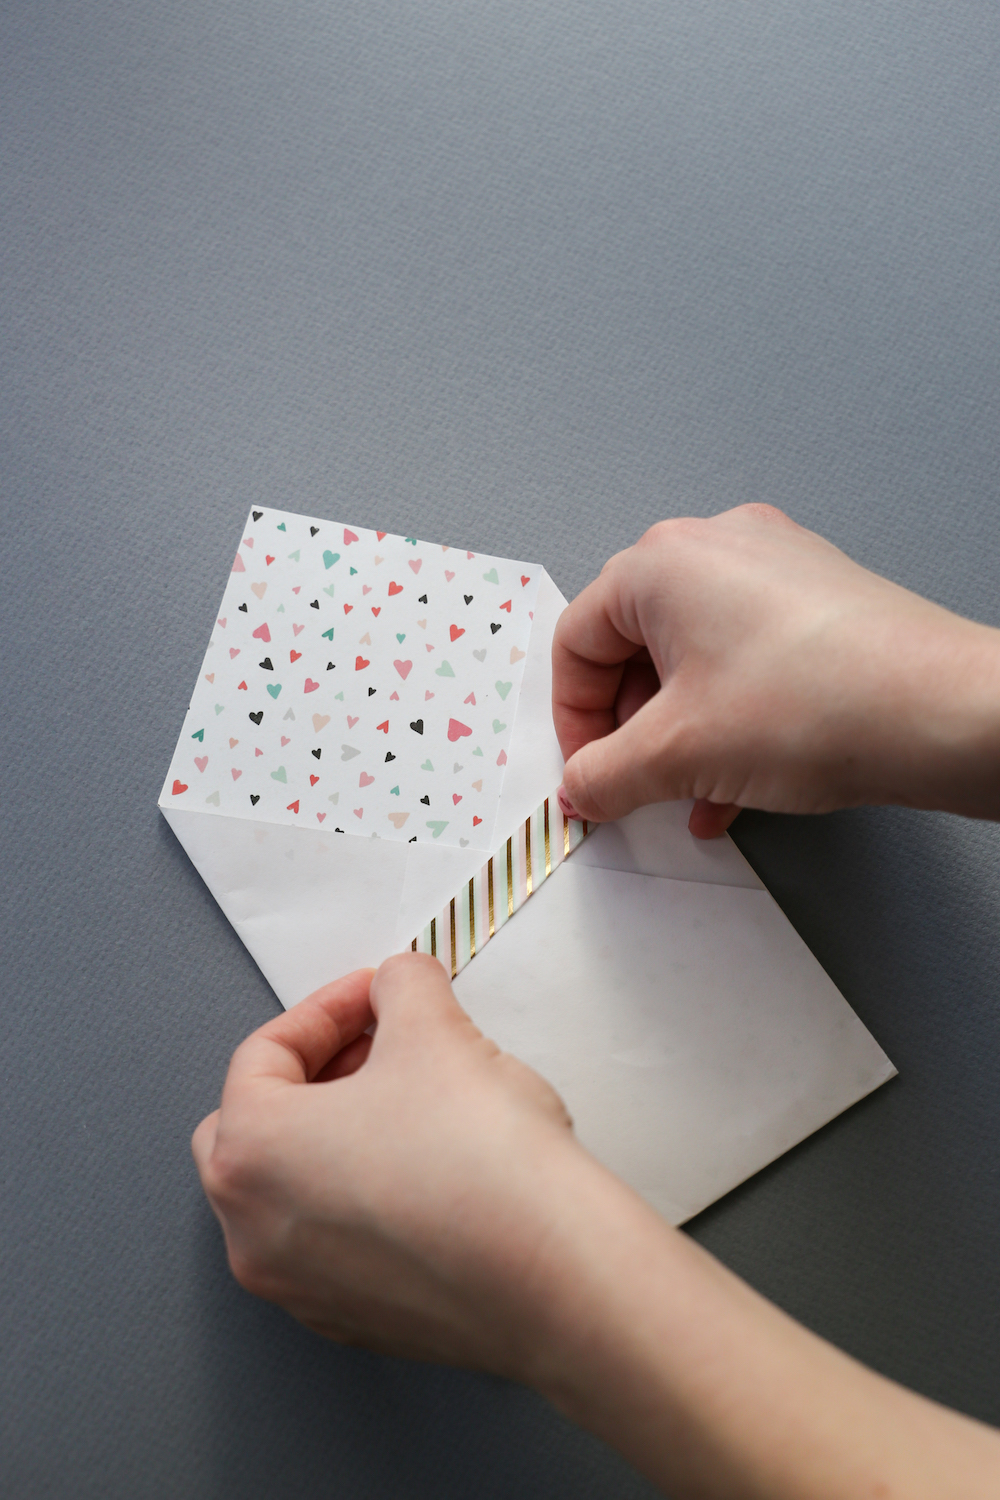
1. Cut the piece of patter paper into a 10” x 10“ piece. The pattern size will be the envelope liner, and the white side will be the outside of the envelope.
2. With the pattern side faced up, fold two corners into the middle of the paper, so the paper is now 5” wide.
3. Fold one other corner of the paper up until it is aligned with the other folder pieces to make an envelope.
4. If mailing the envelope, we recommend adding glue where folded pieces meet to make a seal.
5. Using a piece of decorative tape, hold all folded pieces together.
Now, choose who will receive your handmade card. We may not be able to be physically together, but we can still share the love! Happy Valentines Day!